Permanent Spoofer
Setup Guide
Only focus on the step shown. Finish it, then press Next.
BIOS Setup
About 1 minute
Restart your PC and repeatedly press DELETE or F2 to open BIOS.
Then choose Save & Exit. Can't find a setting? Ask support.
Windows Reinstall
Do only the card shown below.
INTEL WINDOWS GUIDE
No RAID driver setup needed.
Make the Windows USB
1. Plug in a USB.
2. Open Media Creation Tool as Administrator.
3. Choose Create installation media → USB flash drive.
4. Wait until it finishes.
Boot from the USB
1. Restart → repeatedly press DELETE / F2 / F11.
2. Set the USB as the first boot device → press F10 to save.
Clean all disks except the USB
When you see the Windows Setup “Install now” screen, press SHIFT + F10 to open Command Prompt.
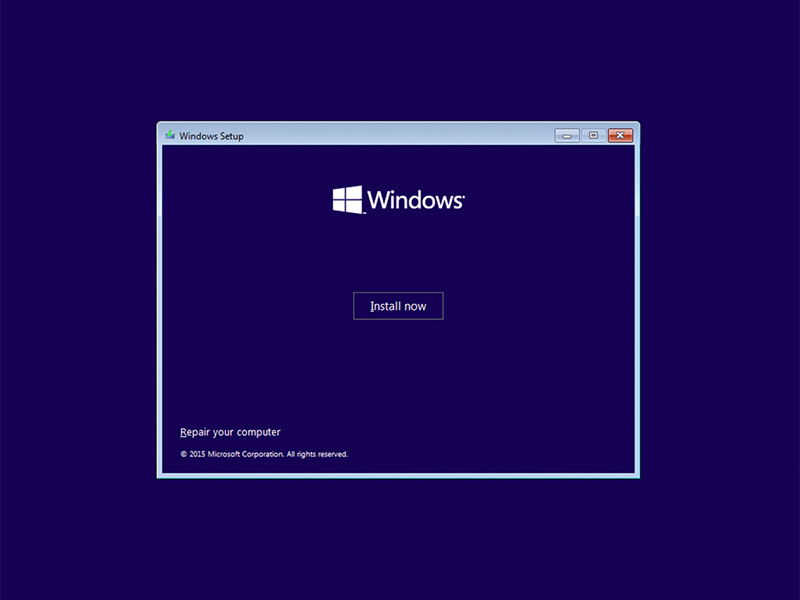
Once on this screen, hold SHIFT + F10 to bring up the Command Prompt.
First, run these two commands once. Click a command to copy it, paste it into Command Prompt, then press Enter.
Skip only the USB. Every other disk must be cleaned AND converted to GPT.
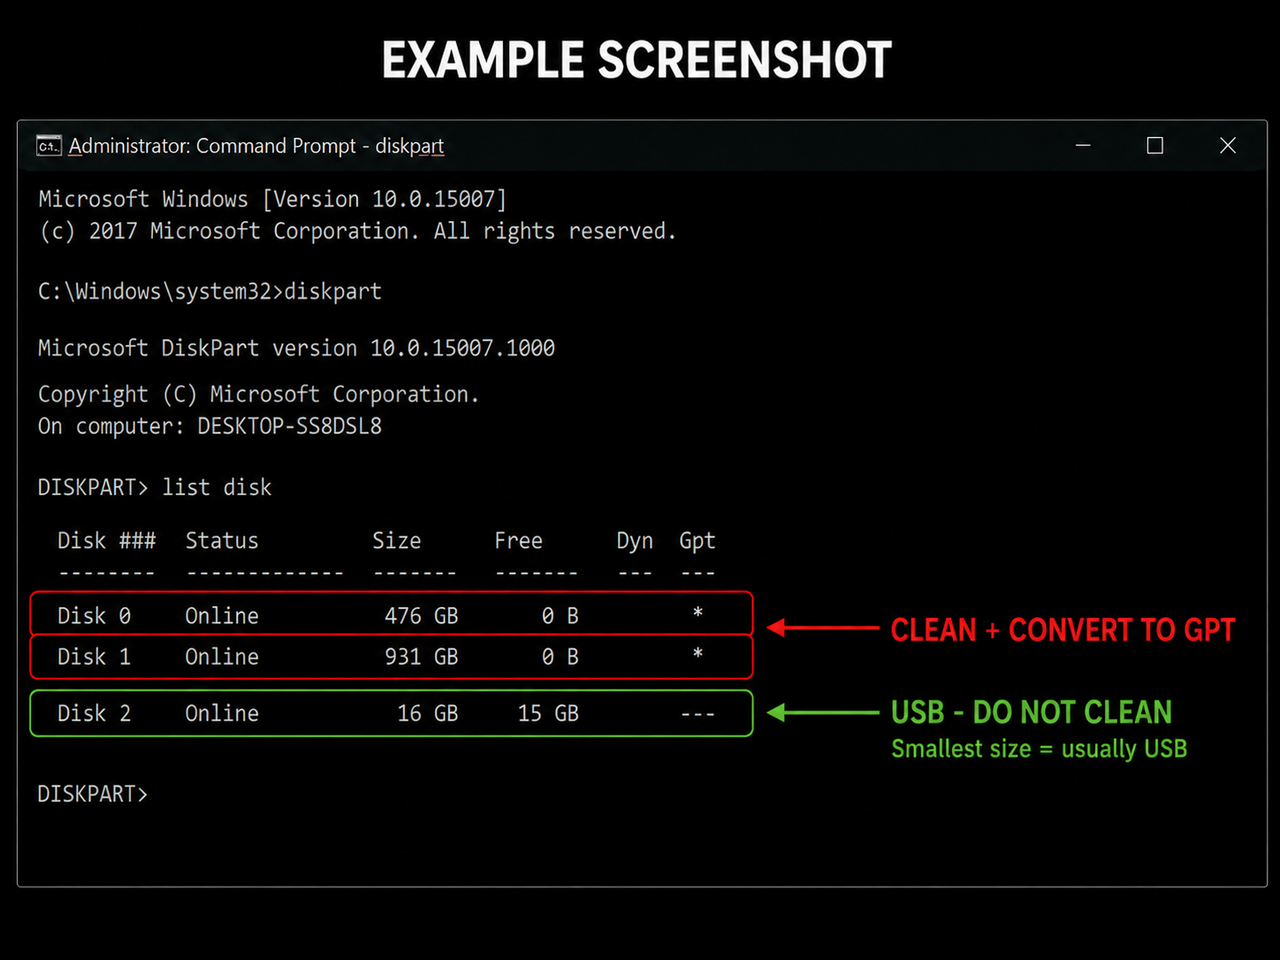
Enter that disk number below, then run all 3 commands in order.
Example: Disk 0 → select disk 0 → clean → convert gpt, then Disk 1 → select disk 1 → clean → convert gpt.
Keep going until every disk except the USB is done.
Only after all non-USB disks are finished:
Close Command Prompt and continue to Step 04.
Install Windows
1. Close Command Prompt.
2. Select the correct Unallocated Space → Next.
3. Keep the USB connected until Windows copies the files and the PC restarts.
AMD RAID0 WINDOWS GUIDE
RAID setup is required.
Make the Windows USB
1. Run Media Creation Tool as Administrator.
2. Choose Create installation media → USB flash drive.
3. Wait until it finishes.
Put the AMD RAID driver on the USB
Not sure? Task Manager → Performance → CPU.
Enter BIOS & enable RAID mode
Restart and spam DELETE to enter BIOS. Then click your motherboard brand below:
SETTINGS → Advanced → Integrated Peripherals → SATA MODE → RAID.
Press F10 to save, then reboot back into BIOS.
Board not listed or it looks different? Ask support before changing anything.
Create RAID array
Go to Advanced → RAIDXpert2 Configuration Utility → Array Management → Delete Array.
Press Enter on each array → Enabled → Delete Array → confirm. Repeat until none remain.
Then Array Management → Create Array. RAID level → Volume → press Enter on Select Physical Disk.
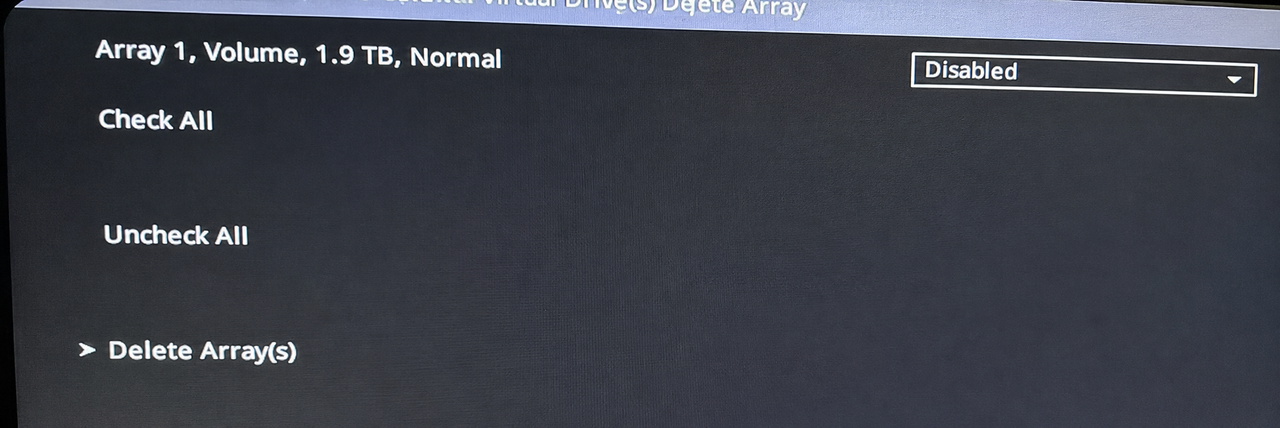

Press F10 to save. PC boots into installer → Install Now → No Product Key → Windows 10/11 Pro → accept → Custom Install.
Load first driver
At the disk selection screen, click Load Driver → Browse.
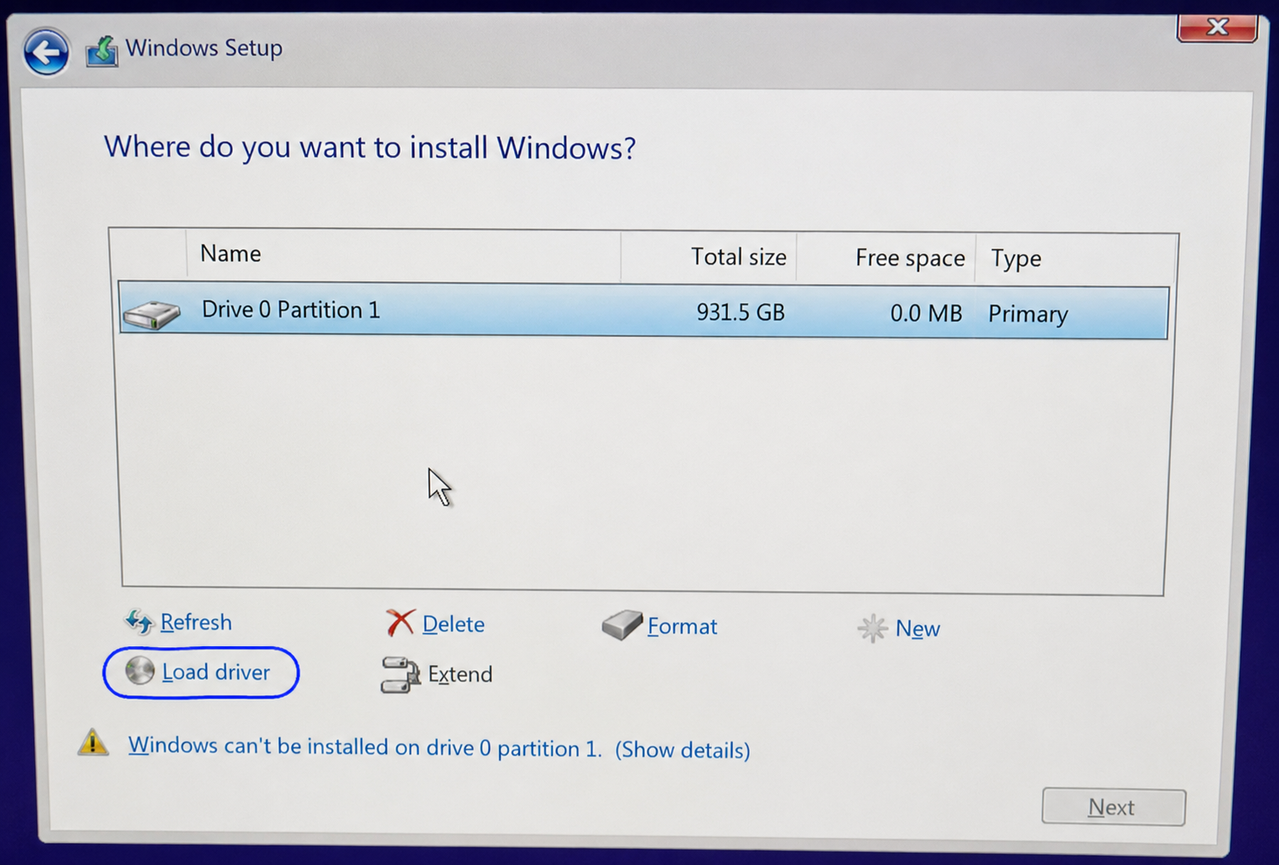
Expand your USB → select the AM4RAID or AM5RAID folder → click OK.
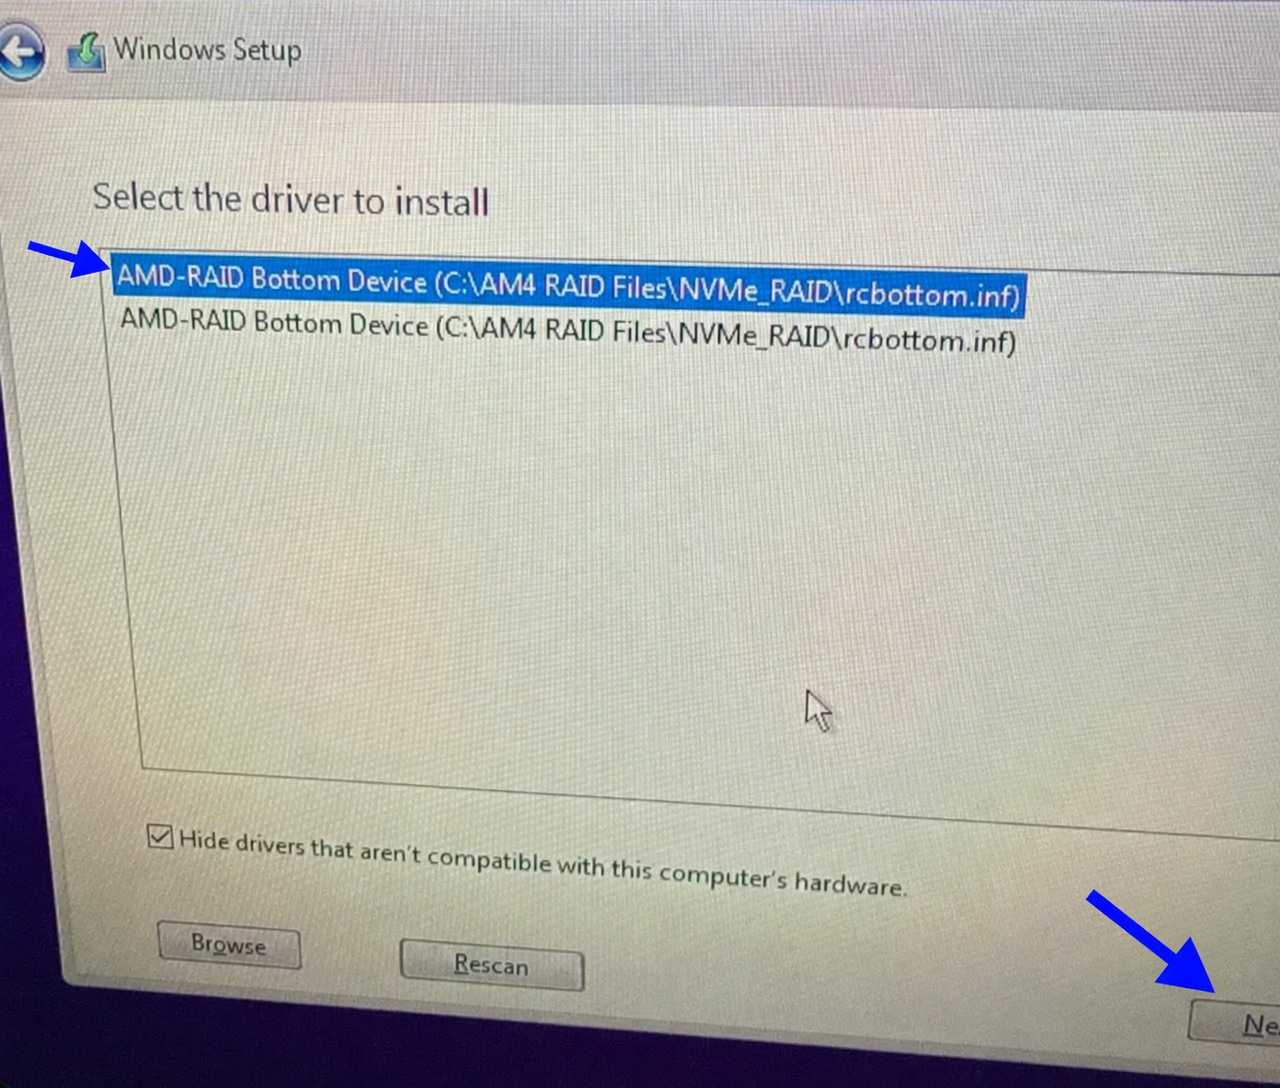
Select the first AMD-RAID Bottom Device → click Next. Wait for the drives to appear.
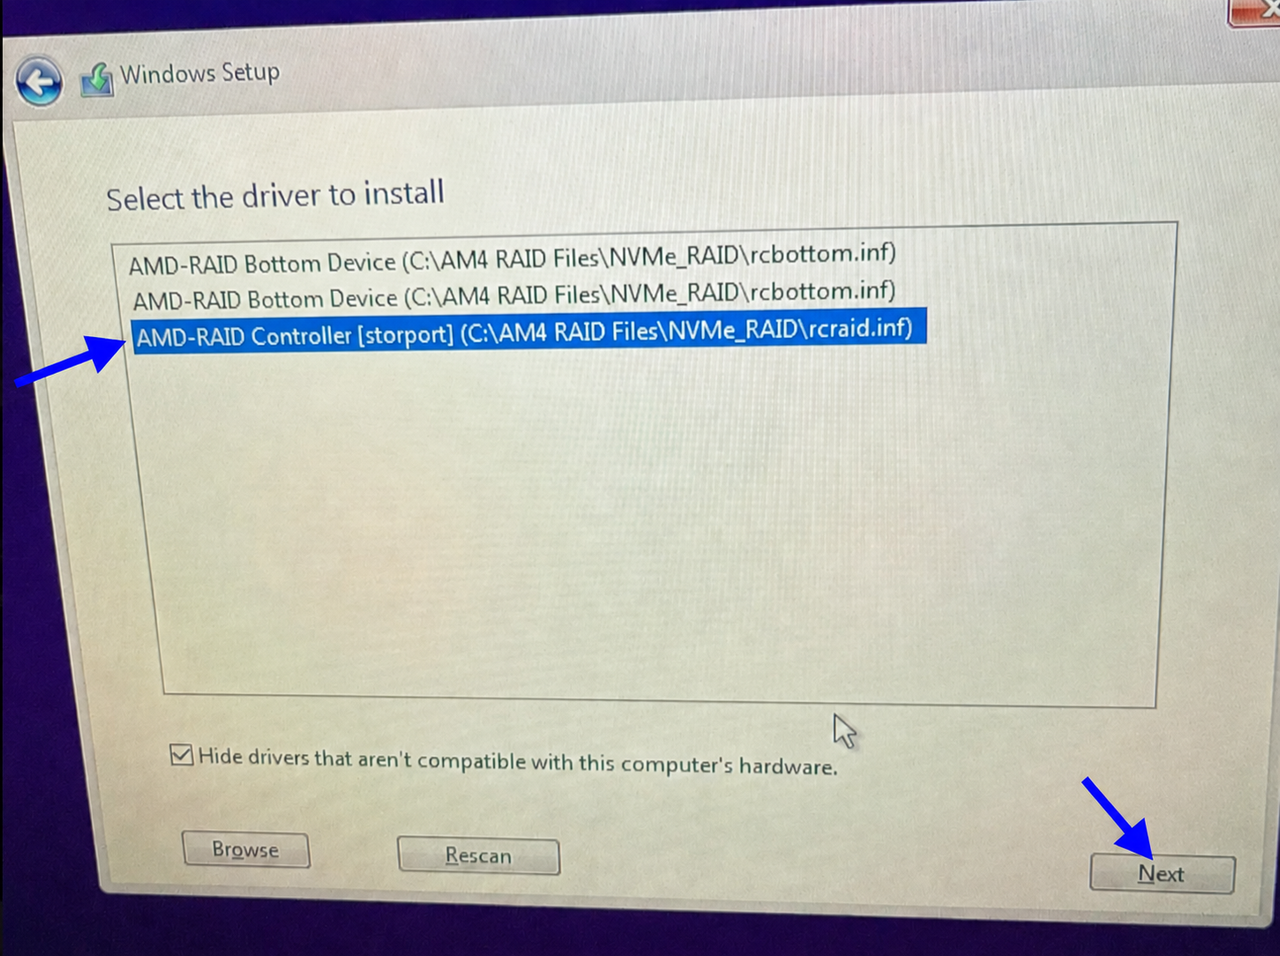
Load second driver — STORPORT
Once the drives appear → click Load Driver → Browse again → open the same AM4RAID / AM5RAID folder → select the 3rd option: AMD RAID CONTROLLER STORPORT → Next.
Spoof & Cleanup
Finish each card, then press Next.
STEP 1 Required Programs
-
1. WinRAR Download
Open the file and install it.
-
2. Visual C++ Download
Extract with WinRAR, then run
Install.batas admin. -
3. DirectX Download
Install it, accept the agreement and untick Bing Bar.
-
4. .NET Download
Download and install the Windows x64 version.
-
5. Win Update Blocker Download
Extract, run
Wub_x64.exe, select Disable Updates, then click Apply Now.
STEP 2 Copy Your Original HWID in a TXT
Download HWID Checker- Download the HWID Checker below.
- Run the checker.
- Copy all displayed serials into a text file.
- Save the file somewhere safe and name it “Before HWID”.
You will use this file later to confirm that your serials changed.
STEP 3 Run the Permanent Spoofer
Download Permanent Spoofer- Download and run the Permanent Spoofer Loader.
- Click the Permanent Spoof button.
-
Very Important — Motherboard Option
Immediately after clicking Permanent Spoof, you MUST choose OTHER, DRIVER ONLY for the motherboard option.
- Make sure GPU Spoof is turned OFF.
- Wait until the process is fully complete.
Do not enable GPU spoofing. Your GPU serial staying unchanged is normal.
STEP 4 Clean Spoofer Traces
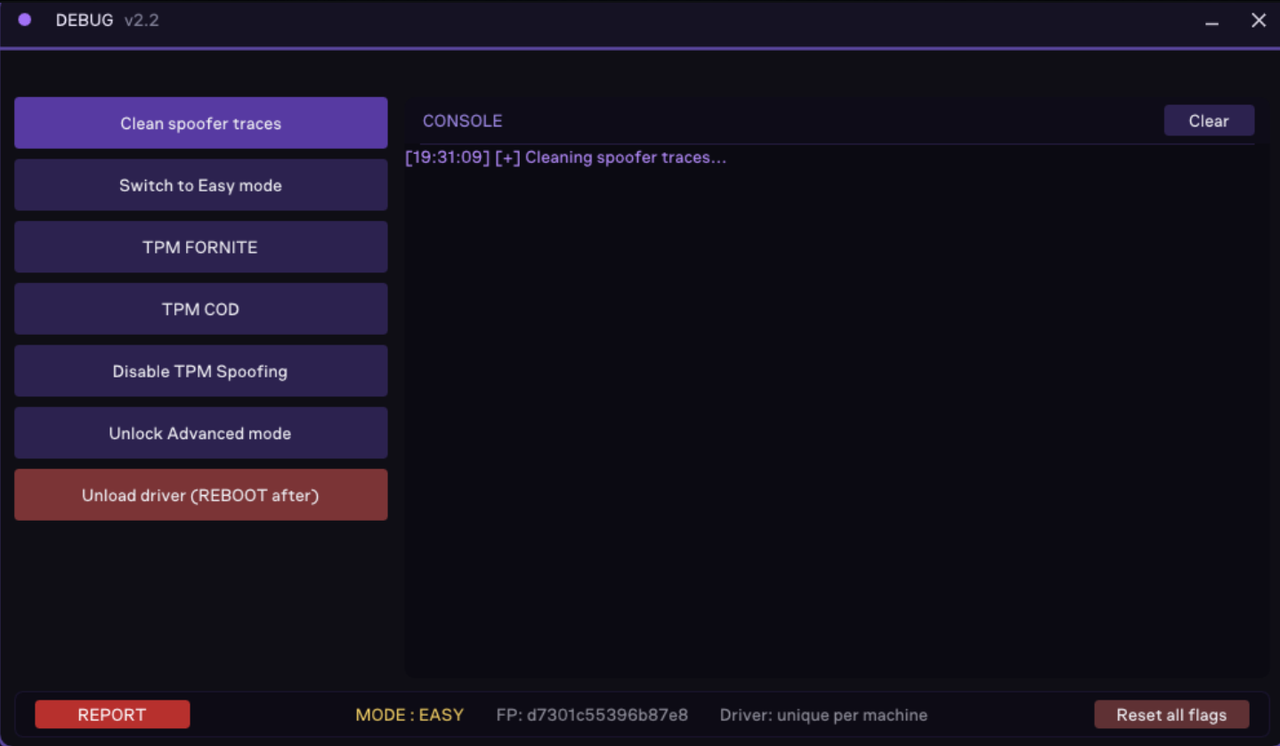
Download Debug CleanupOpen debug.exe as administrator → click Clean Spoofer Traces → press OK.
Once it shows Cleaning spoofer traces..., you are done.
STEP 5 Check Your New HWID
Download HWID Checker- Run the HWID Checker again.
- Copy the new serials into another text file.
- Save it as “After HWID”.
- Compare it with your “Before HWID” file.
Confirm before continuing:
- Motherboard serial changed
- Disk serials changed
- Network serials changed
- Other supported serials changed
- GPU serial did not change
Do not continue if the required serials are unchanged.
STEP 6 Security & Network Setup
DO NOT LOG INTO THESE
Do NOT log into third-party software that requires an account while completing the setup:
CANCEL ALL FIREWALL POPUPS
When Windows shows a firewall popup for a spoofed game, press Cancel / X. Do not allow it.
Use an Ethernet cable for this step.
- Right-click Wifi & Bluetooth Disabler.bat → Run as administrator.
- When Command Prompt opens, type 5 for Disable BOTH (WiFi & Bluetooth) → press Enter.
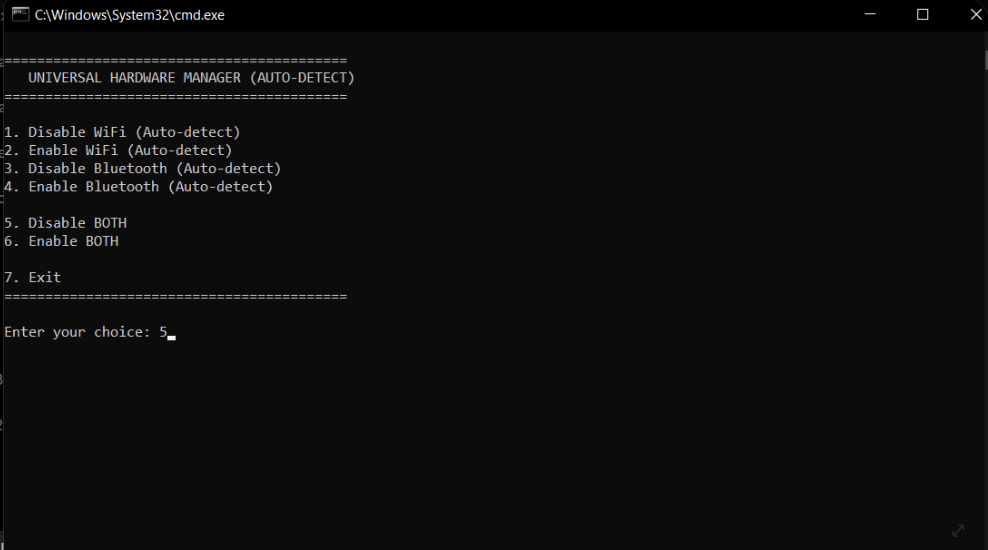
If the text appears in red or shows successful, it worked.
STEP 7 Device Cleanup
DOWNLOAD DEVICE CLEANUP- Right-click DeviceCleanup.exe → Run as administrator.
- In the top menu, go to Devices → Select All.
- Go back to Devices → Remove Selected.
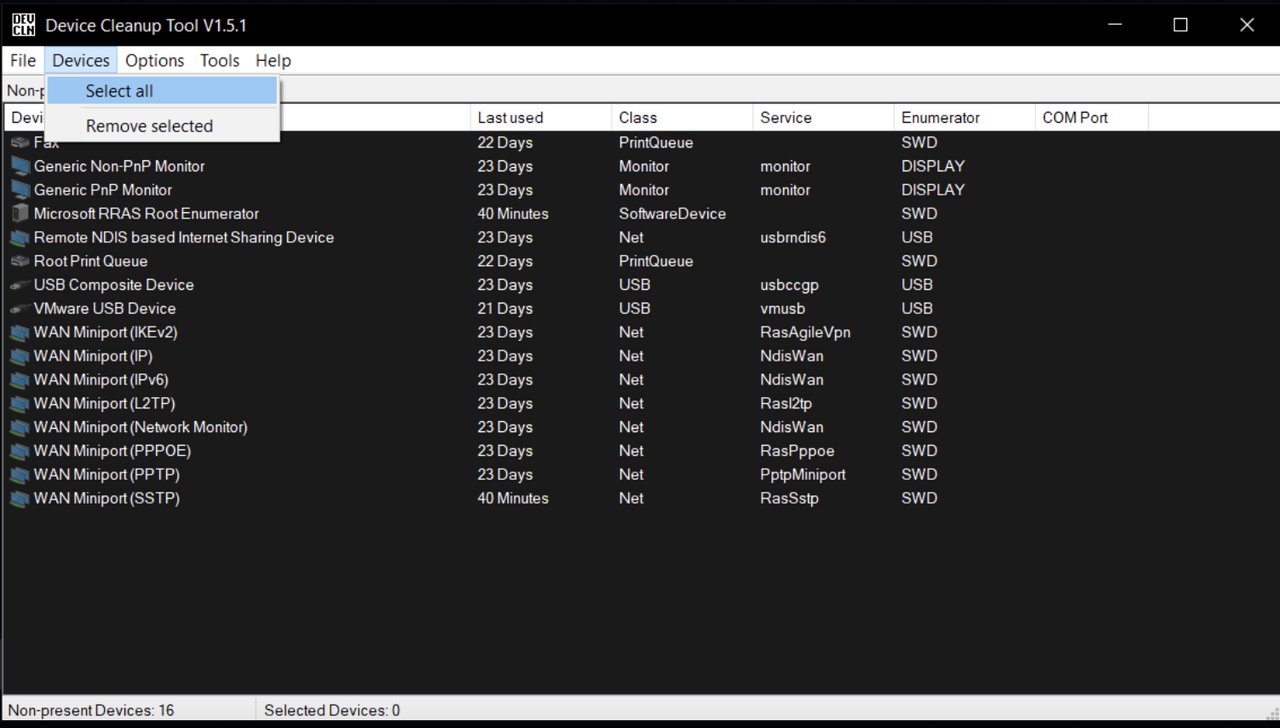
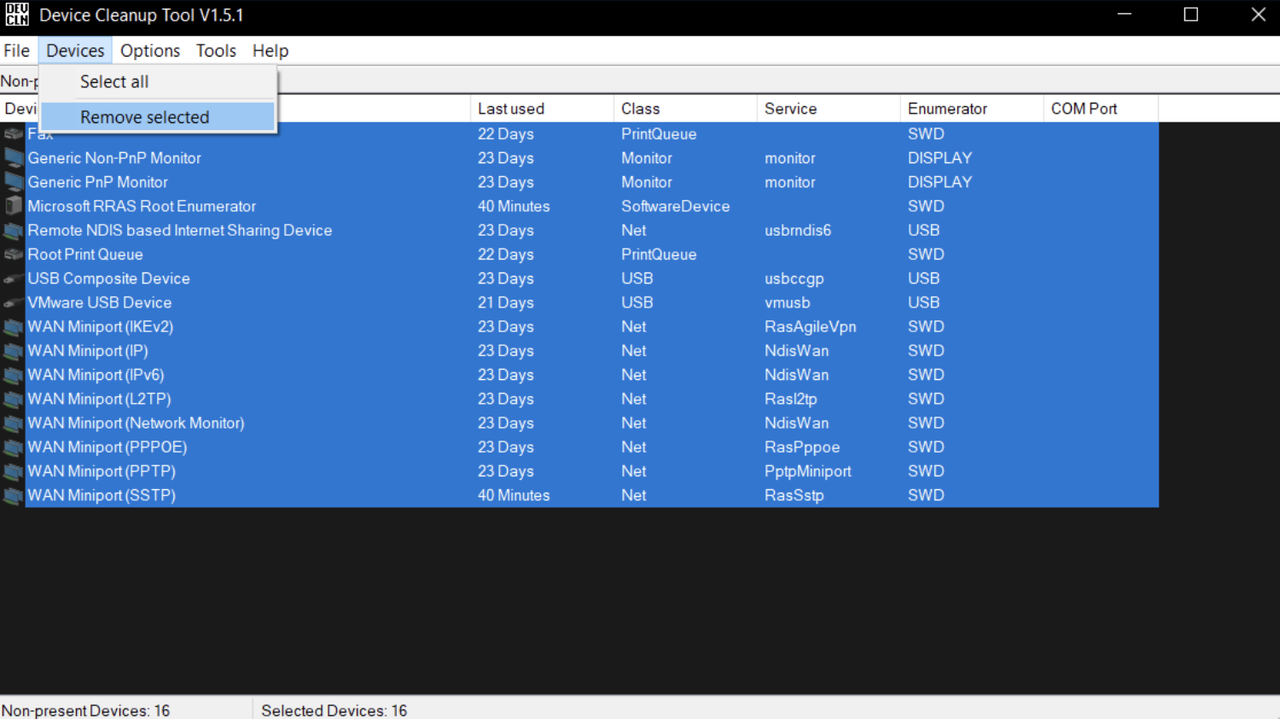
If WiFi cards or WAN Miniport adapters are still displayed, right-click them → Disable device manually, then redo Device Cleanup.
Setup Complete
You have now completed every step and can install Rust.
PROTECTING YOUR LEGACY
Avoid using a main account that has already been kicked or banned. Returning to a previously flagged account can reconnect the new hardware identity to the old account history.
After spoofing, do not sign into an account that was previously banned or flagged.
Do not reinstall windows or your spoof is gone